This article is for administrators only. Only a user with the administrator role can create new request or tickets forms.
How to create and set up request forms
Requests forms and its workflow you set up the in the administration.
- Go to administration
- Select "Requests and tickets" in the menu
- Make settings according to the following options
- Save the form settings
Create an employee request or tickets forms
Employee request and ticket forms are designed to simplify basic processes with easy-to-use forms. As an administrator, you can create forms based on your company’s specific needs. Employees with the feature enabled can see all the request and ticket forms available for their roles.
Approval options are shown to users when a form that includes their name on the approval list is created.
Who can submit a request or tickets and who can approve it
- All office and intranet users can submit requests and tickets unless their role has been disabled from doing so.
- You can set any office user as an approver.
How to create a form for requests or tickets
Go to the administration settings and then go to the "Tickets & Requests" tab. Here, you will see three additional tabs. The first tab contains settings for forms, the second for managing supervisors and subordinates, and the third for managing request groups. Navigate to the “Tickets & requests settings” tab in the administration panel. You can edit a report or request by clicking on it.
Create a new request form by clicking on the "+" button:
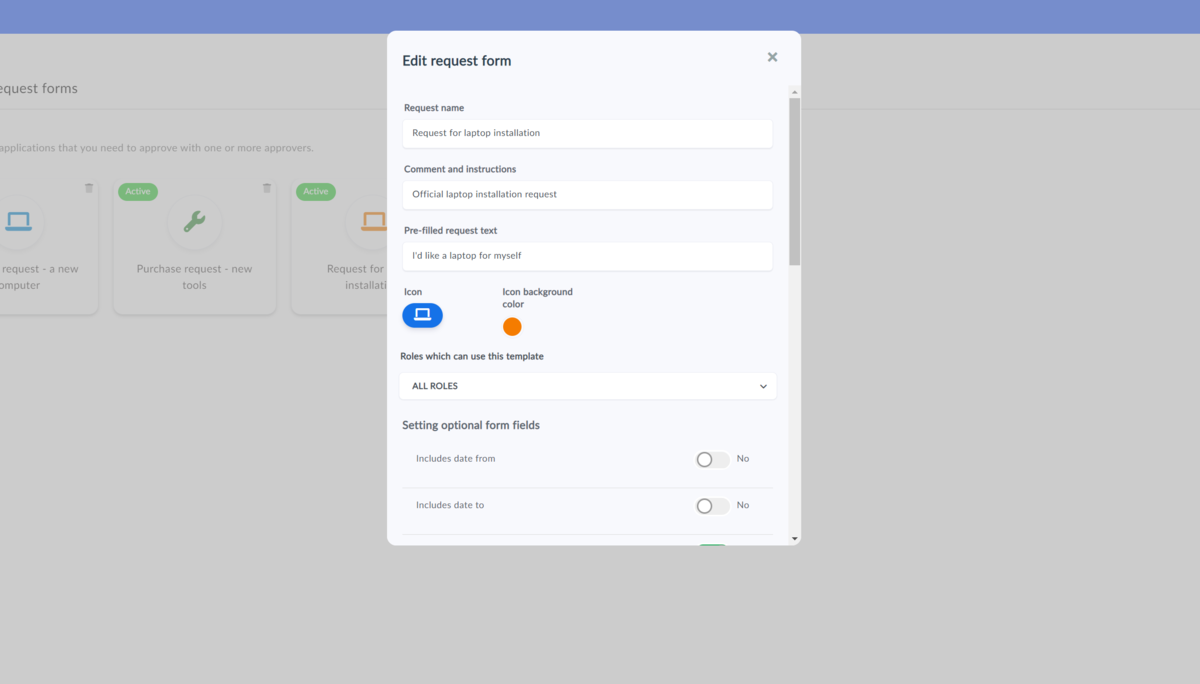
- Enter the request name that will be displayed to your users, for example, “Computer Purchase Request.”
- Optionally, provide additional brief instructions for the requester.
- Enter the request text that will be pre-filled for users.
- Choose an appropriate icon and its color.
- You can make the form available to all roles or restrict the request to selected roles by choosing from the list.
- Start Date - the start date, for example, when requesting vacation.
- End Date - the end date, for example, the end of the vacation request.
- Required Date - for example, the deadline for the computer installation.
- You can also add a record from which an item can be selected (only one record can be selected per form), and the request will automatically be linked to it.
- Enable or disable file and attachment uploads.
- Select the approval type - in parallel approval, all approvers can approve simultaneously, while in sequential approval, the order of approvers must be considered.
- In the “Who Approves” section, select the users who will approve the request. You can also select a supervisor as an approver, who will be automatically filled in based on the supervisor settings when the form is submitted by the user.
Assign an approver (this step is necessary to activate the request). Until an approver is assigned, the request will not be available to employees on the portal, and you will not see it as active.
If you do not want any of the listed features available in the form, make sure it is not marked with a green slider.
When creating an incident report/tickets, follow a similar process, with the difference that reports/tickets do not require an approval type, as they only need confirmation.
How to activate requests and reports for users
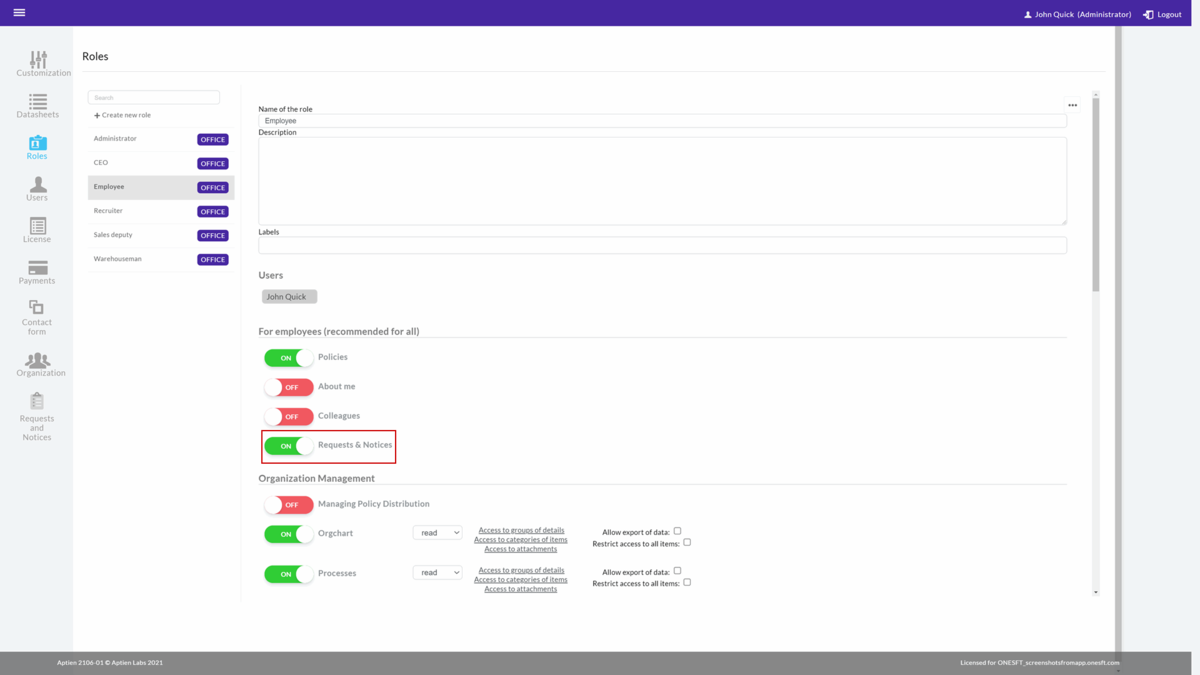
Go to the administration settings and the "Roles" tab. Select a role and activate (turn on) "My requests"

