This article is for administrators only.
How to set up digital handover or assignment of assets to an employee
- Select the organizer where you keep the items you want to hand over (e.g. PPE)
- Go to the organizer settings
- Open the "Actions" tab
- Select "Add new action button"
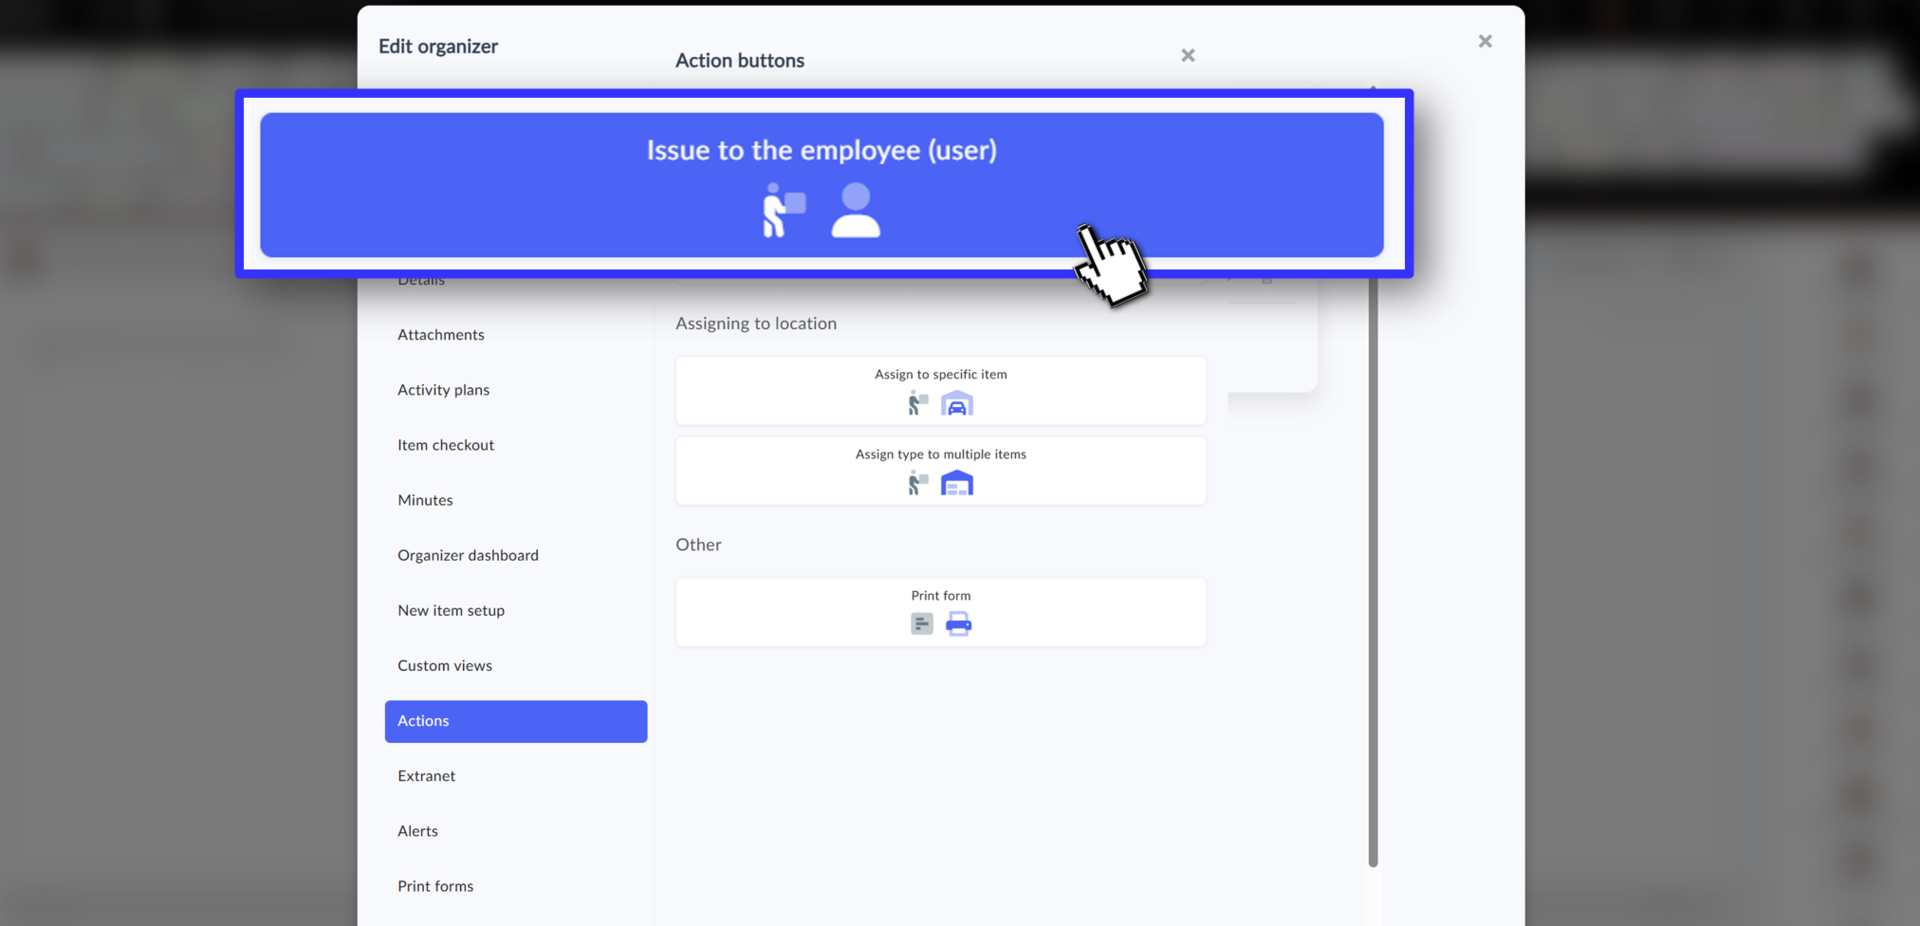
How to Set Up Specific Item Handover
First, let's show you how to set up the digital handover of a specific item that is always assigned to only one employee or user. For example, a laptop, a car, and so on. This is property that you keep track of with a unique identifier (ID, inventory number, serial number, etc.) in
- Select "Issue to the Employee" - this means assigning or issuing a specific item to an employee or a user
- Only one person can have the item at any given time.
- If you need to hand over the asset to another employee, you must first take the device back.
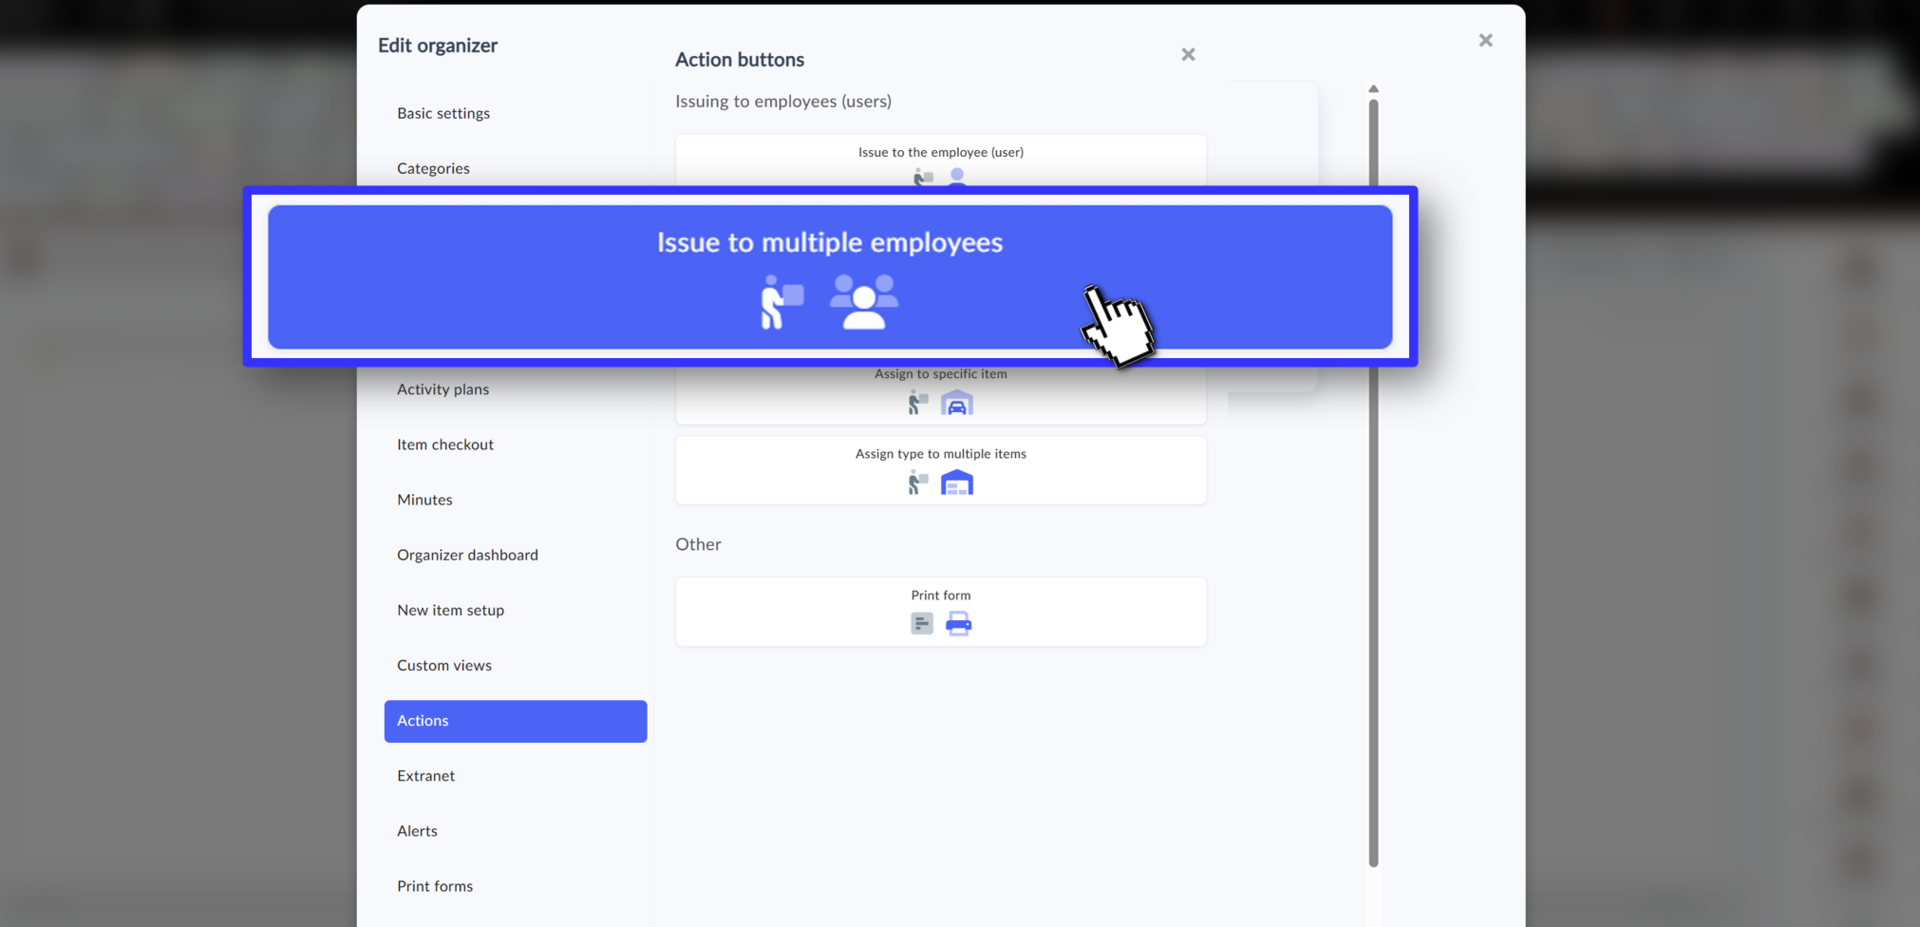
How to Set up Asset Transfers for Multiple Users
Often, you only need an overview of what equipment you've issued to employees. You don't track specific pieces of equipment, but rather the quantities issued. You primarily need to know which employees received the equipment and have it available. For this purpose, you set up the "Transfer to Multiple Users" button.
- Select "Issue to Multiple Employees" - This assigns or issues the item to a user. For example, you can issue size M gloves this way.
- You assign units to users.
In the digital form settings, you further choose what the transferring and receiving parties will see and how the transfer will be confirmed.
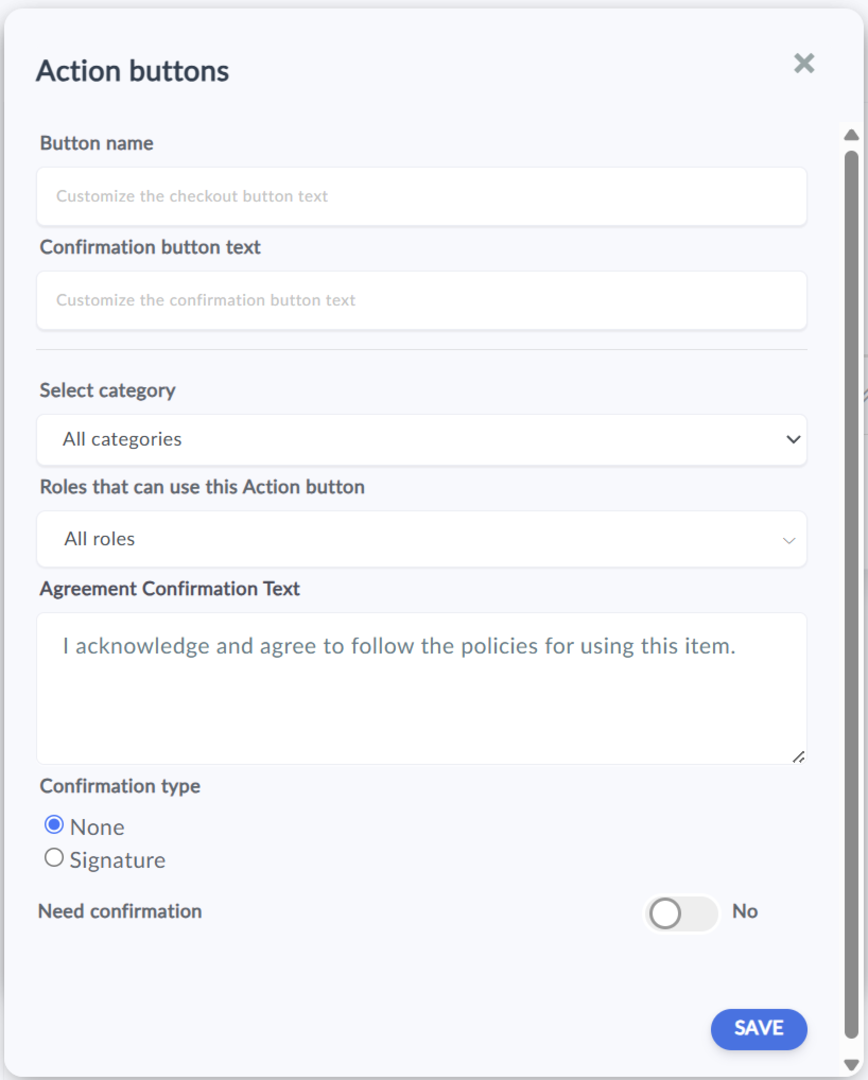
- Enter the text that will be displayed on the button, for example, "Issue Computer"
- By selecting a category, you can narrow down the selection of items for which the button will be displayed.
- Role selection is the most important. Because the transfer of assets can only be done by an authorized person, it is necessary to consider who will have the right to transfer when setting up. Then, set it only to the specific roles of these users; in that case, no one else can start the transfer. If you handle authorization at the inventory level, you can leave the display set to all roles.
- It is also important to choose the type of confirmation - whether the transfer will be confirmed by the recipient only with a button or with their signature on the screen.
- You can set whether the transfer will be confirmed only by the transferring party, or whether confirmation must also be done by the employee after logging into their self-service portal.
- The text of the agreement to the terms and conditions is displayed to the user during the transfer. If you do not fill in anything, no text will be displayed. This text is also displayed on the check out protocol.