You can upload or update data using the import
This article is for administrators. Only the administrator can import data.
Import saves you time because it allows you to upload a large amount of data into the system, and you do not have to waste time entering it one by one.
You can fill an Organizer with items or update the items in the Organizer. You can import data into any Organizer. All you need is an XLSX file and data inside it.
It is important to realize the quality of imported data is based on the quality of your source. If you import low-quality data from the Excel table, that's what the system will contain.
How to import data into Aptien
Data preparation
First of all, you need to prepare the Excel file with all the data you want to import into the specific Organizer. Columns in Excel are like fields (details) in the Organizer, and rows are separate records.
1 row in the file's table = 1 item
The import can create a new detail during the process.
Recommendations
We recommend preparing the table to match the structure of the Organizer. We also recommend renaming the columns to match the names of the details in the Organizer.
By following these recommendations, it is easier to finish the importing process correctly. We also recommend following these rules regarding data in Excel tables:
- Edit the cells in Excel, so the format matches the one you use in Aptien for the detail. This is recommended, so the importing process is finished without any errors. If the cells are not in the same format as the detail, your import might import data differently than you wanted. The process is not at fault, but the preparation is
- Watch out for spaces in front of or after the text (wrong: " date of signature", correct: "date of signature")
- Watch out for spaces in front of or after the column's name or the cell's value
- The cells must not contain any formulas
- The column's name must not contain quotation marks
- Watch out for hidden rows (because of a filter): the import tool imports all the rows in the table, whether they are visible or not at that moment
The importing process
Select the Organizer to import your data and click on the import icon at the bottom.
The import wizard will take you through the process:
- Select or drag the source file with the data
- The wizard shows a preview of the table
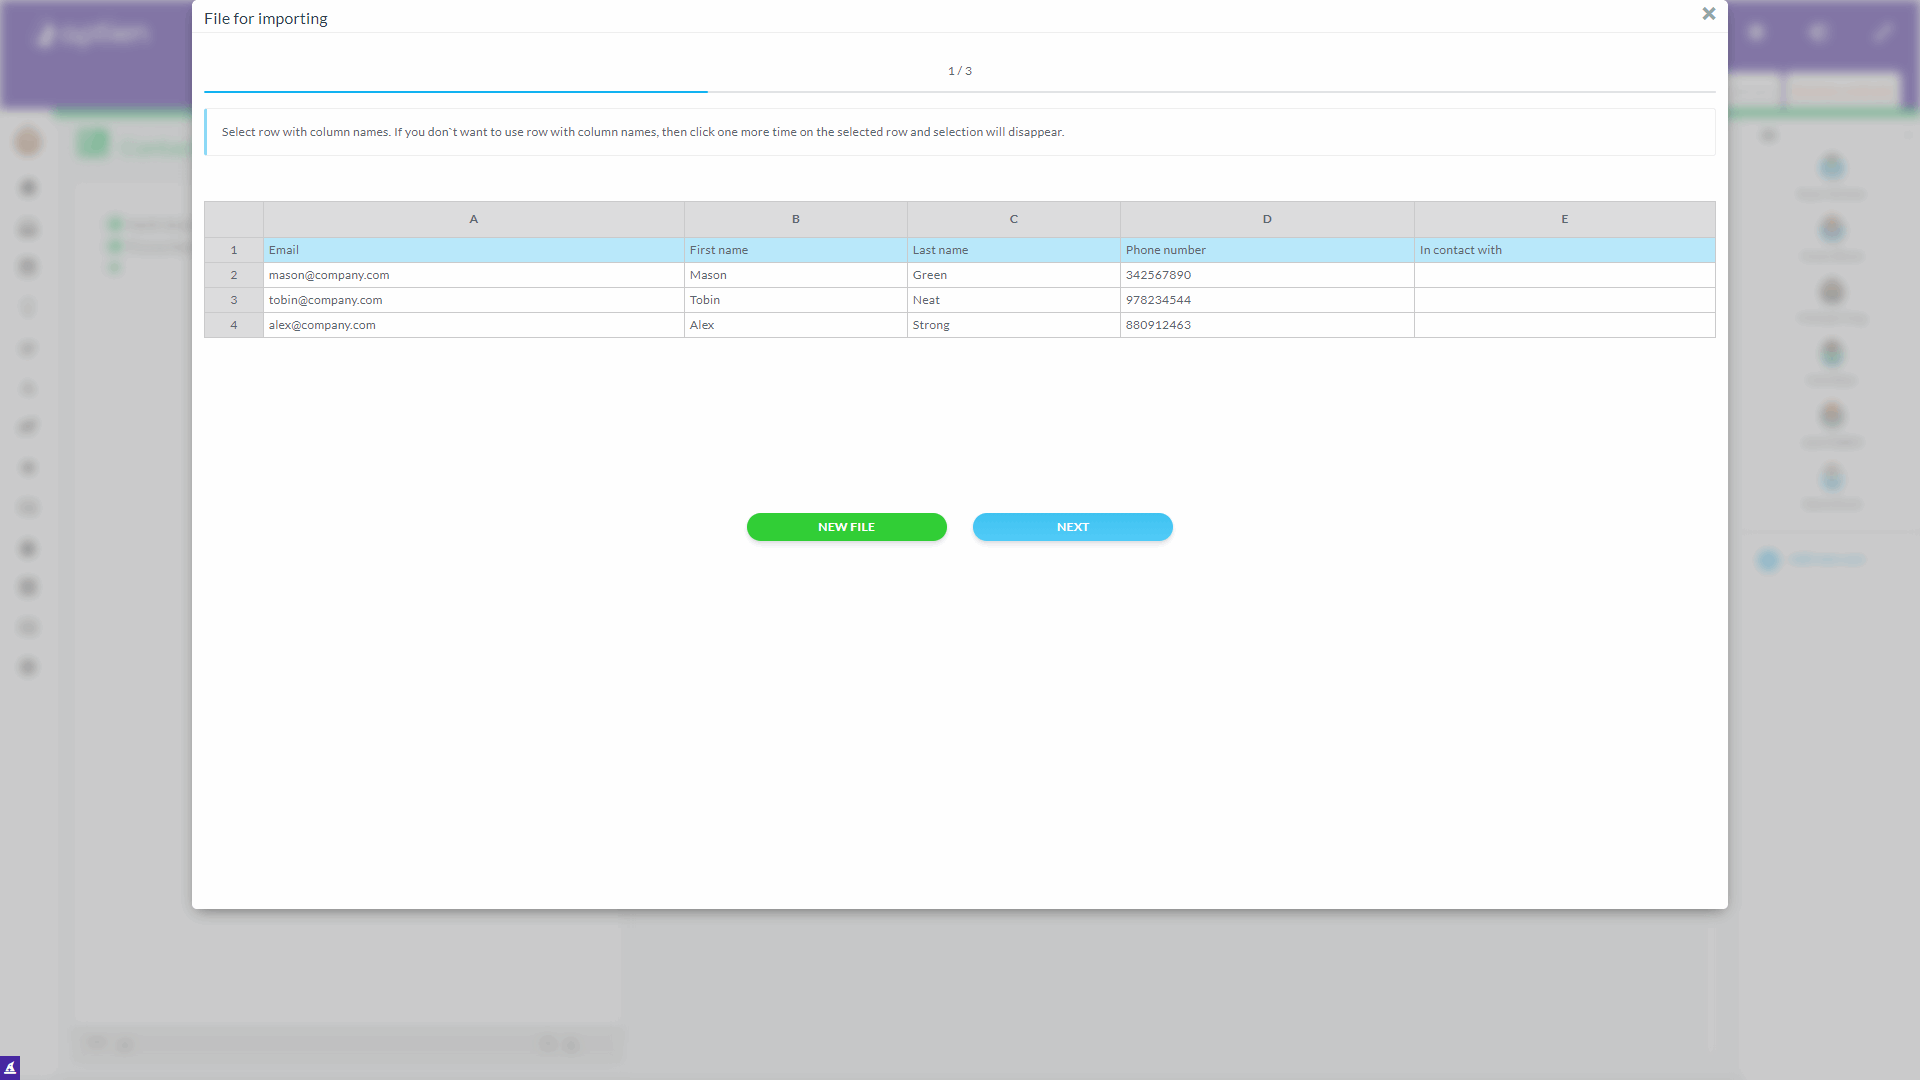
- Select the row containing the column names. It is usually the first row of the table
- Select the column containing the names of the items. It is an important decision because these will be the names of your items
- The system matches the details with the columns based on their names. If the columns do not match, you have to select the actions for the columns manually. You can choose to create a new detail

Options explanation
- Skip this detail - this leaves out the column completely
- New detail - adds new detail and uploads data
- Category - assigns items to categories in this column
Preview and recap
- Check the preview and confirm
- By confirming, you launch the import

Check and import deletion
Check your imported data. If you made a mistake, you could use the import history to delete the import and start over. The button is in the bottom bar of the item's list. Proceed by pressing the "Delete" button.
How to update data using import
The process is the same, but during the last step, check "Update all items".