Once you have conducted a risk analysis, you can proceed to prioritize them using the risk matrix
The risk matrix enables a clear risk assessment
The risk matrix allows you to assess and evaluate risks according to two criteria that you specify. The most common are probability and impact.
- This plugin allows you to select and choose any two criteria you use for your risk assessment
- You set up the risk map in the risk register.
How the risk matrix works
The risk matrix allows you to define and customize the risk matrix according to your methodology. It allows you to select axes and define and map individual zones to the matrix, which helps you classify risks and implement corrective actions.
- Criteria (axes) can have any number of degrees,
- In the base, the scales have 4 degrees defined, so the matrix has a total of 16 zones.
- You can adjust the number and names of degrees according to your methodology - the extension automatically takes over the scale and names from these enumerations - it doesn't matter if the scale of your impacts has 3 or 5 degrees, the extension automatically recalculates the matrix.
The matrix will be displayed to you in the risk register dashboard and allows for quick filtering and display of specific risks by individual zones, i.e. risk qualification according to your risk management methodology.
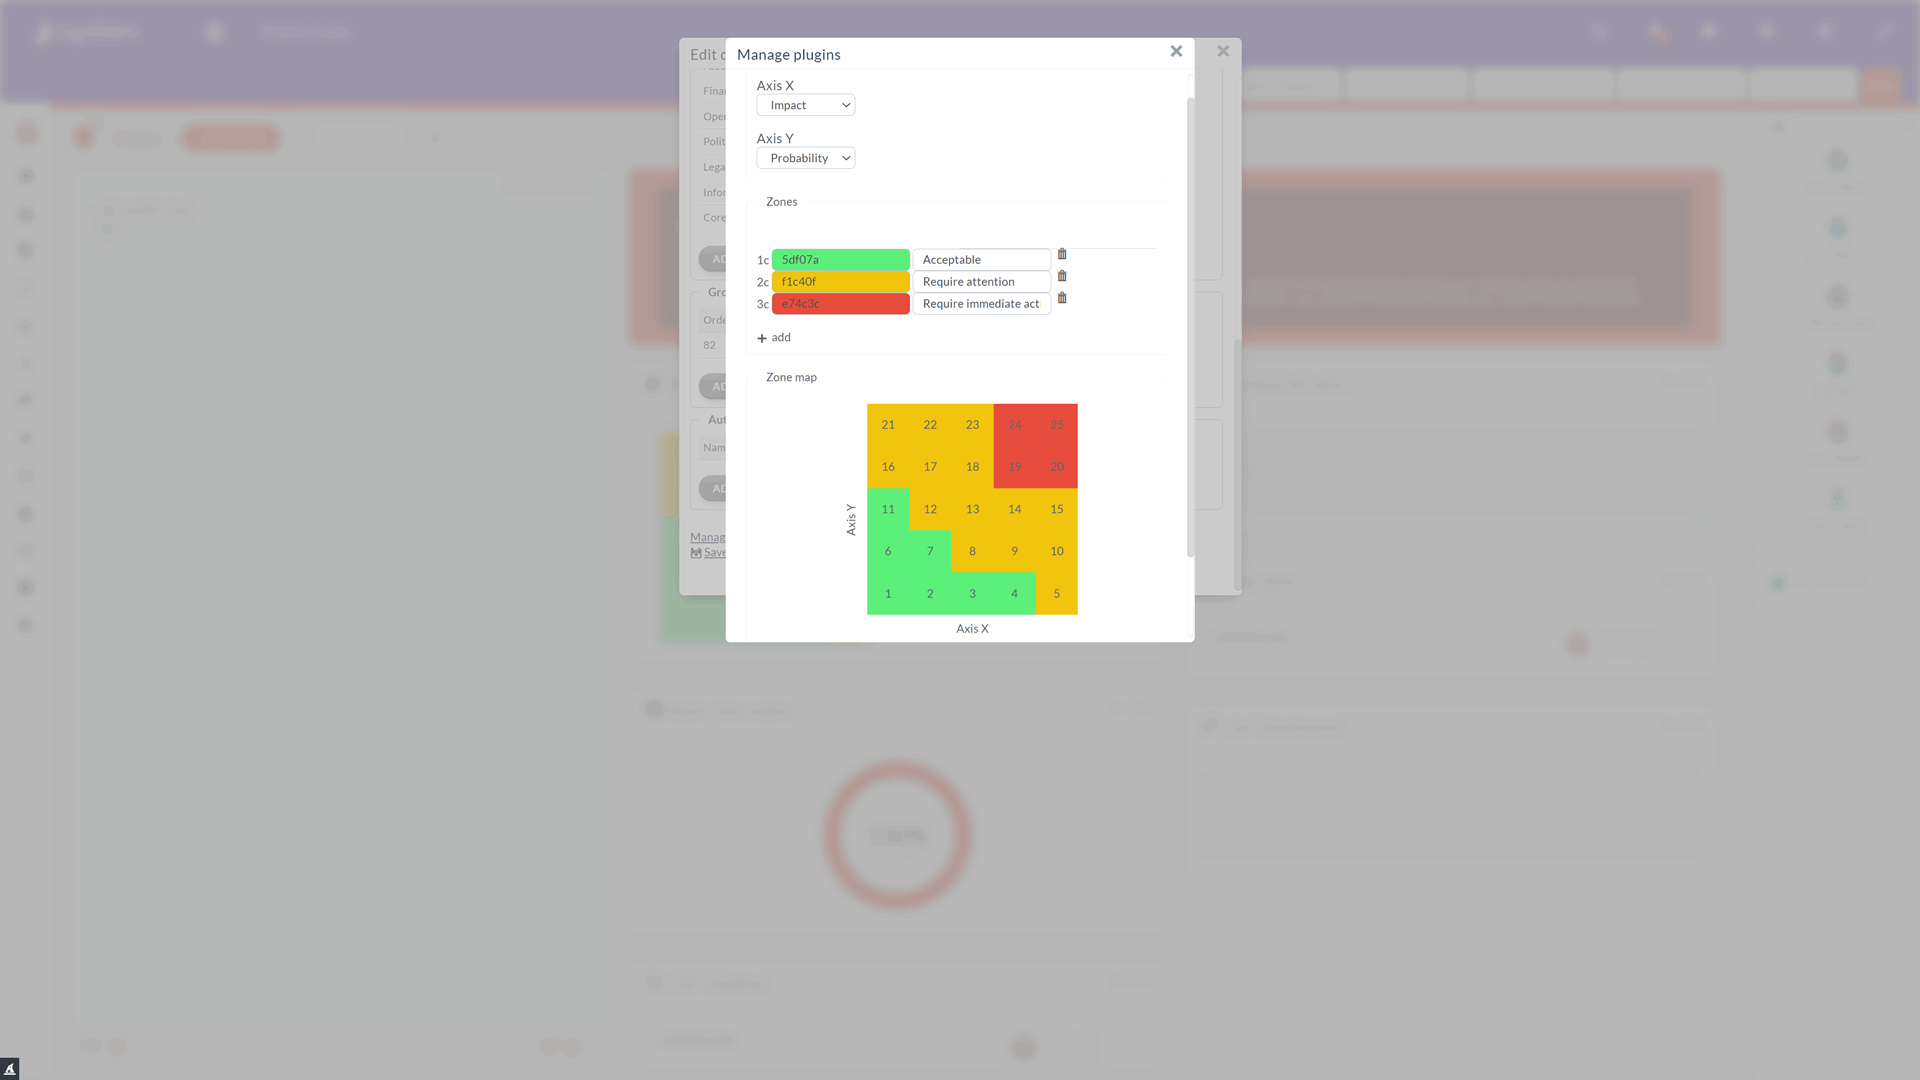
How to setup risk matrix axes
The risk matrix plugin allows you to select two criteria to map to the lists you use in your Risks Organizer. As addressed, the most common are probability and impact. The extension will automatically take the scale from these lists - it doesn't matter if your impact scale has 3 to 5 levels; the extension will automatically recalculate the matrix. Most often, the scales are 4 levels, so this results in a 4x4 matrix.
How to setup risk priority zones
Next, the matrix allows you to define zones that correspond to how you address the measure - risk mitigation or prioritization of risks. You then map these zones to the individual intersections in the risk matrix. Three zones are most commonly used, namely for acceptable risks, those that require attention, and risks with high probability and impact, the immediate response is usually used.
- The zones are then mapped to the intersections in the matrix.
- The matrix is displayed in your risk management dashboard and allows you to quickly filter and view specific risks by zone, thus qualifying risks according to your risk management methodology.
Recommendations for risk matrix settings
- Define your axes - most commonly impact and probability, 4 levels
Divide your risks into three zones of priorities (levels of risks)
- Green zone - low risk, acceptable
- Yellow zone - moderate, medium risk, may be acceptable or requires action in the long term
- Orange zone - high risk is considered unacceptable and rapid action is required
- Red zone - critical risk is considered totally unacceptable, critical - needs quick or even immediate action
How to activate the risk matrix plugin
To display the risk map, you need to activate the corresponding extension, which only the system administrator can activate.
- The corresponding plugin needs to be activated in the Organizer settings
- Click on "Organizer dashboard" and activate the risks plugin
- Within the risk map settings, you choose what details will represent each axis (details are set from the evidence template). Impact and Probability are mostly used.
- Another configurable value is Zones (three are preset). It is possible to write your own description of these zones, set their color, delete or add a new zone.
- If you want to map individual zones, you need to click on each number in the matrix and set which zone it is in.
- Confirm the settings with "Save"
The settings for the matrix will then be displayed on the Risk Organizer dashboard.