This article is intended for administrators. You must be logged in as an administrator to set up roles.
Restricting access to all items
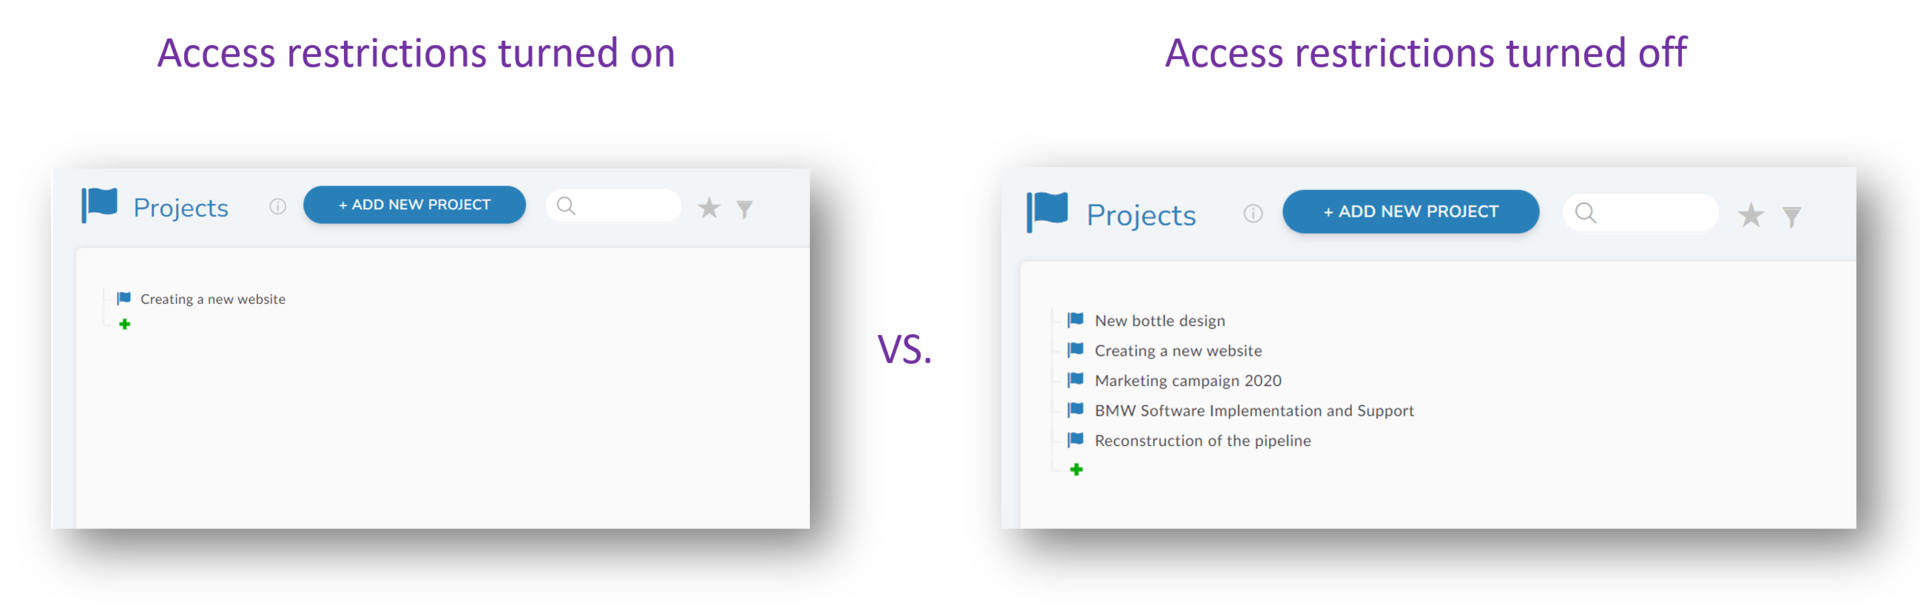
Normally, the role has access to all items in the organizer. If you want to restrict access to only the items that users in the role create or use, you use this setting.
Users logged in under this role can only see those items that:
- is assigned by another user with the level "grant permission"
- user under this role created the item
Recommendations and tips
- If you assign multiple users to a role set up this way, they will all see the items that any of the assigned users have created under that role. It will therefore behave like a team role. For example, all sales representatives with the role "Sales Representative Chicago"
- If you want a user to see only "their" items, create an individual role for each of them, for example, "Sales Representative John Doe". In this case, you will assign this role only to John Doe.
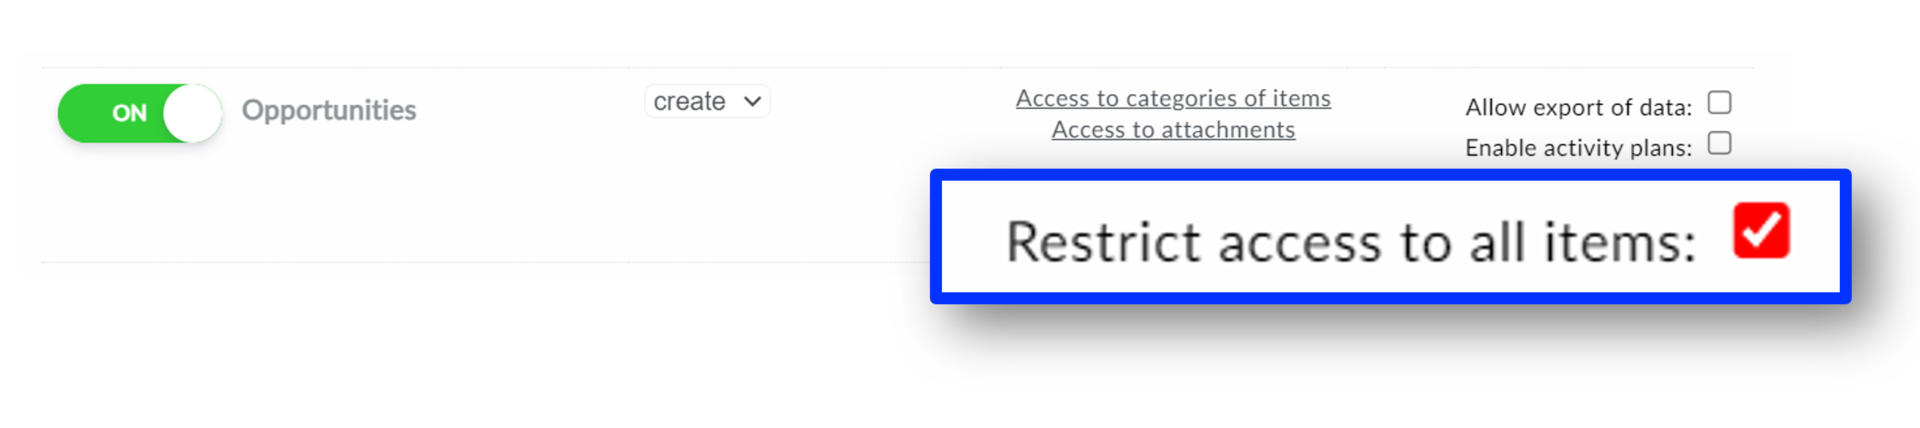
How to set restrictions on access to all items
- Go to Administration
- Select "Roles" from the menu
- Click to select the specific role you want to change
- In the right section, select the organizer in which you want to make the change
- Set the permissions for the organizer by ticking "Restrict access to all items"
- Save the settings
Permission levels you can set
- OFF - no access - the user will not see this organizer in the list of organizers at all
- read - the user can see the organizer, but the data (detail values) are read-only
- edit - the user can edit existing entries (names, detail values), but can't create or delete entries
- create - the user can create items, but cannot delete them
- delete - the user can both create and delete items