How to set the QR label format for printing
For QR labels, you need to set their format for printing.
- Go to the administration
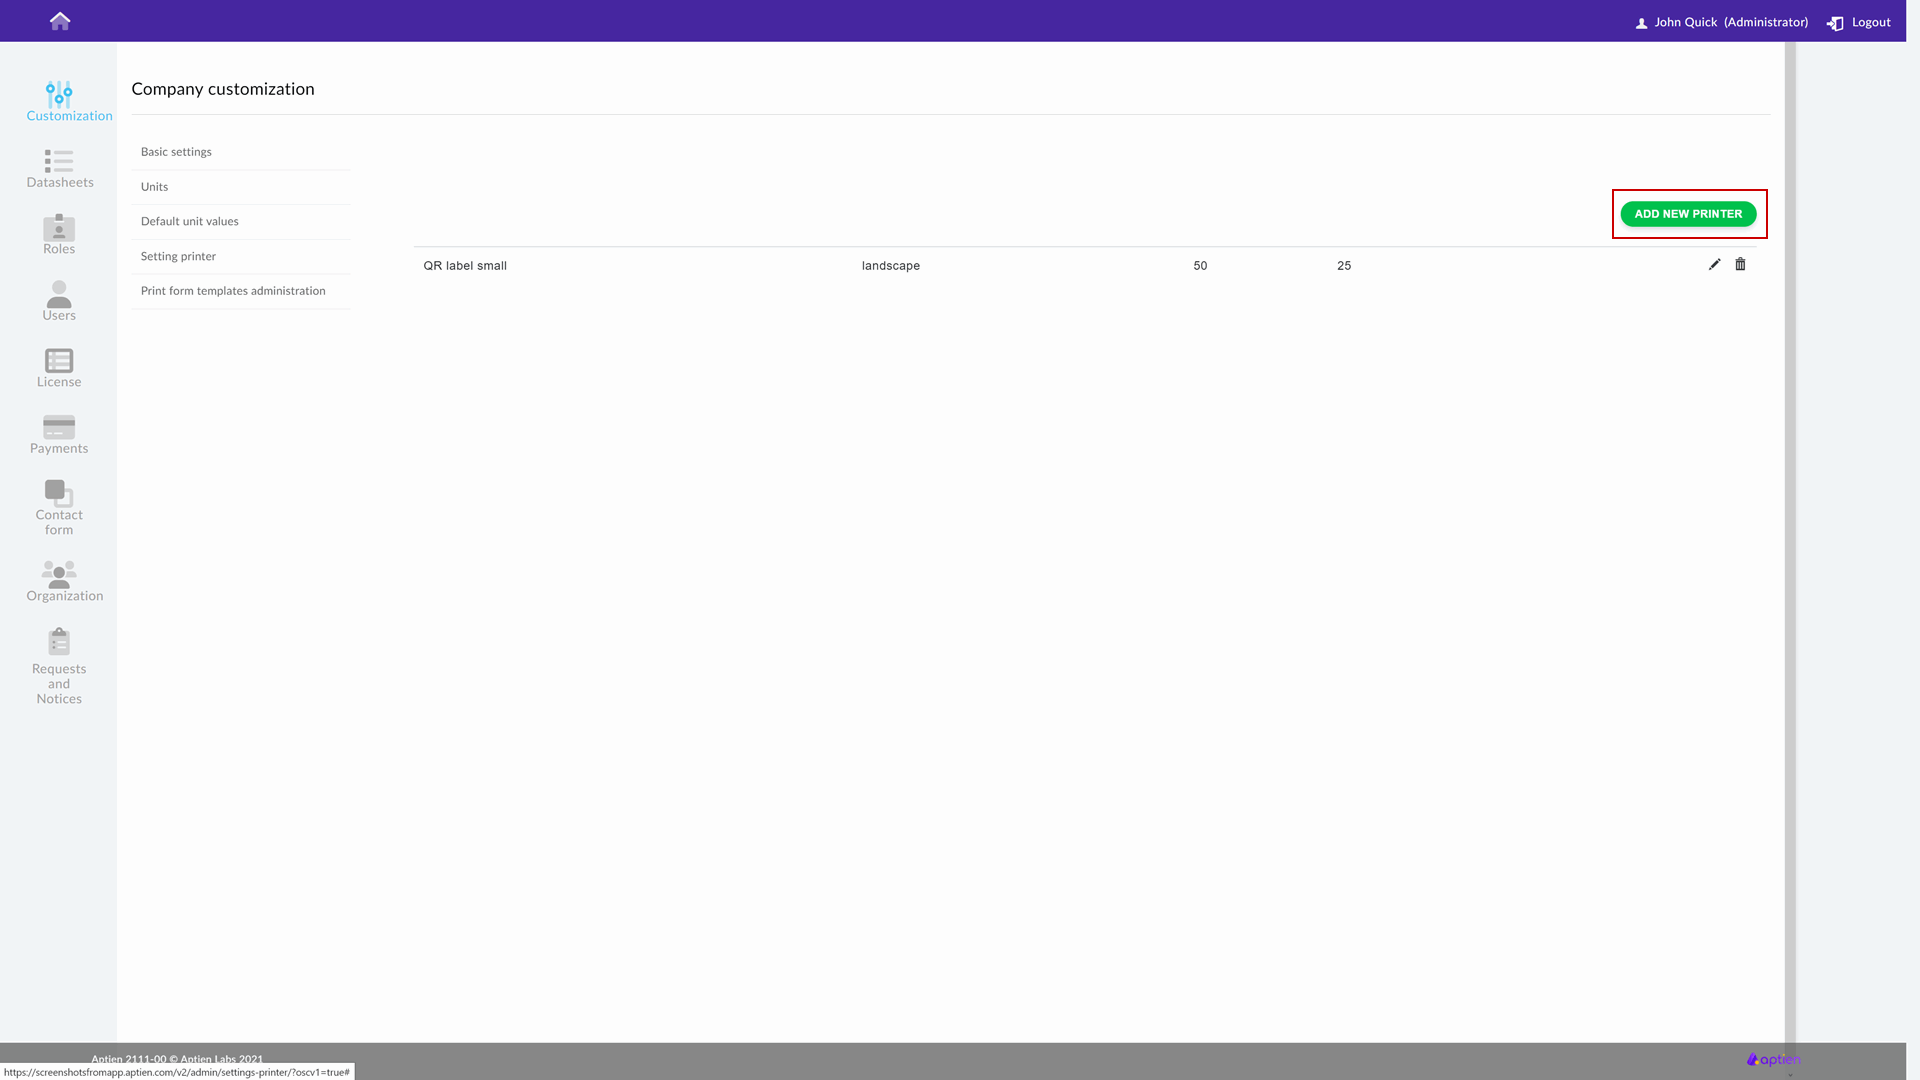
- Under the "Customization" tab in the menu, select "Setting Printer"
- Click on "Add Printer"
- Here set:
Format name, for example "QR label small"
Description for better orientation
Orientation of the label in portrait or landscape, we recommend choosing landscape
Size X - label width, we recommend 50 or more
Size Y - label height, we recommend 25 - Save the settings
How to set up QR tag creation
In the application, you can create a view for any organizer that users can access after retrieving a QR label, for example, on an asset. Setting up QR labels (views) is per category in the organizer and if you want to set up QR labels for all categories, you need to do this separately and set up a new view for each category.
- Open the organizer settings
- Go to the "Manage custom views" tab
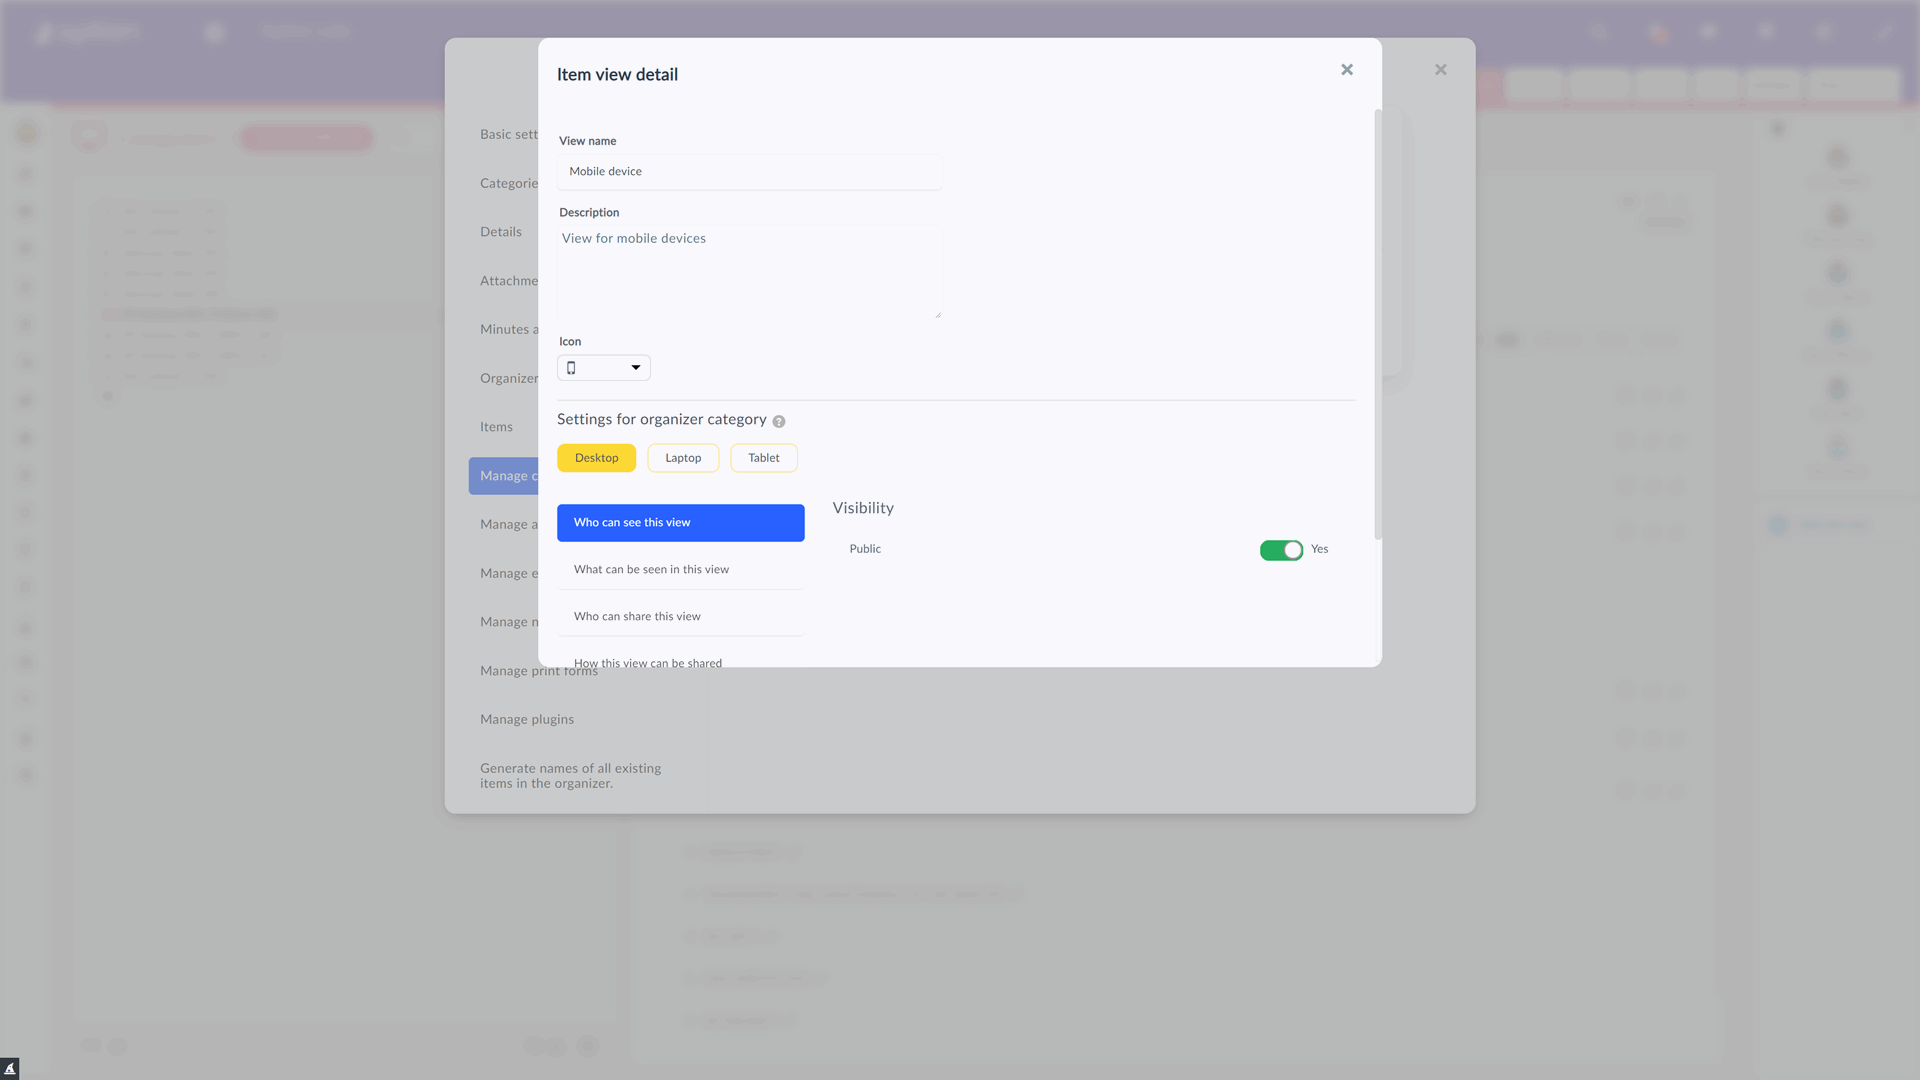
- Create a new view using the "Add new item view" button
- Fill in the name, description for further specification and the category for which you want to use the QR label
- In the "Who can see this view" tab, select the roles you want to display the information to after the QR code is scanned. If you check the "Public" option, any user can view the information after the QR code is scanned
- Under the "What can be seen in this view" tab, select the specific details (information) that will be displayed after the QR code is scanned. In the "Print with QR code" column, select the information you want to be displayed on the label after printing and in the "Show in item view" column, select the information you want to display to users after the QR code is scanned
- In the "Who can share this view" tab, select the roles that will be able to print the QR label
- In the "How this view can be shared" tab, check the "Print QR label" option
- You are all set. Confirm with the "Save" button
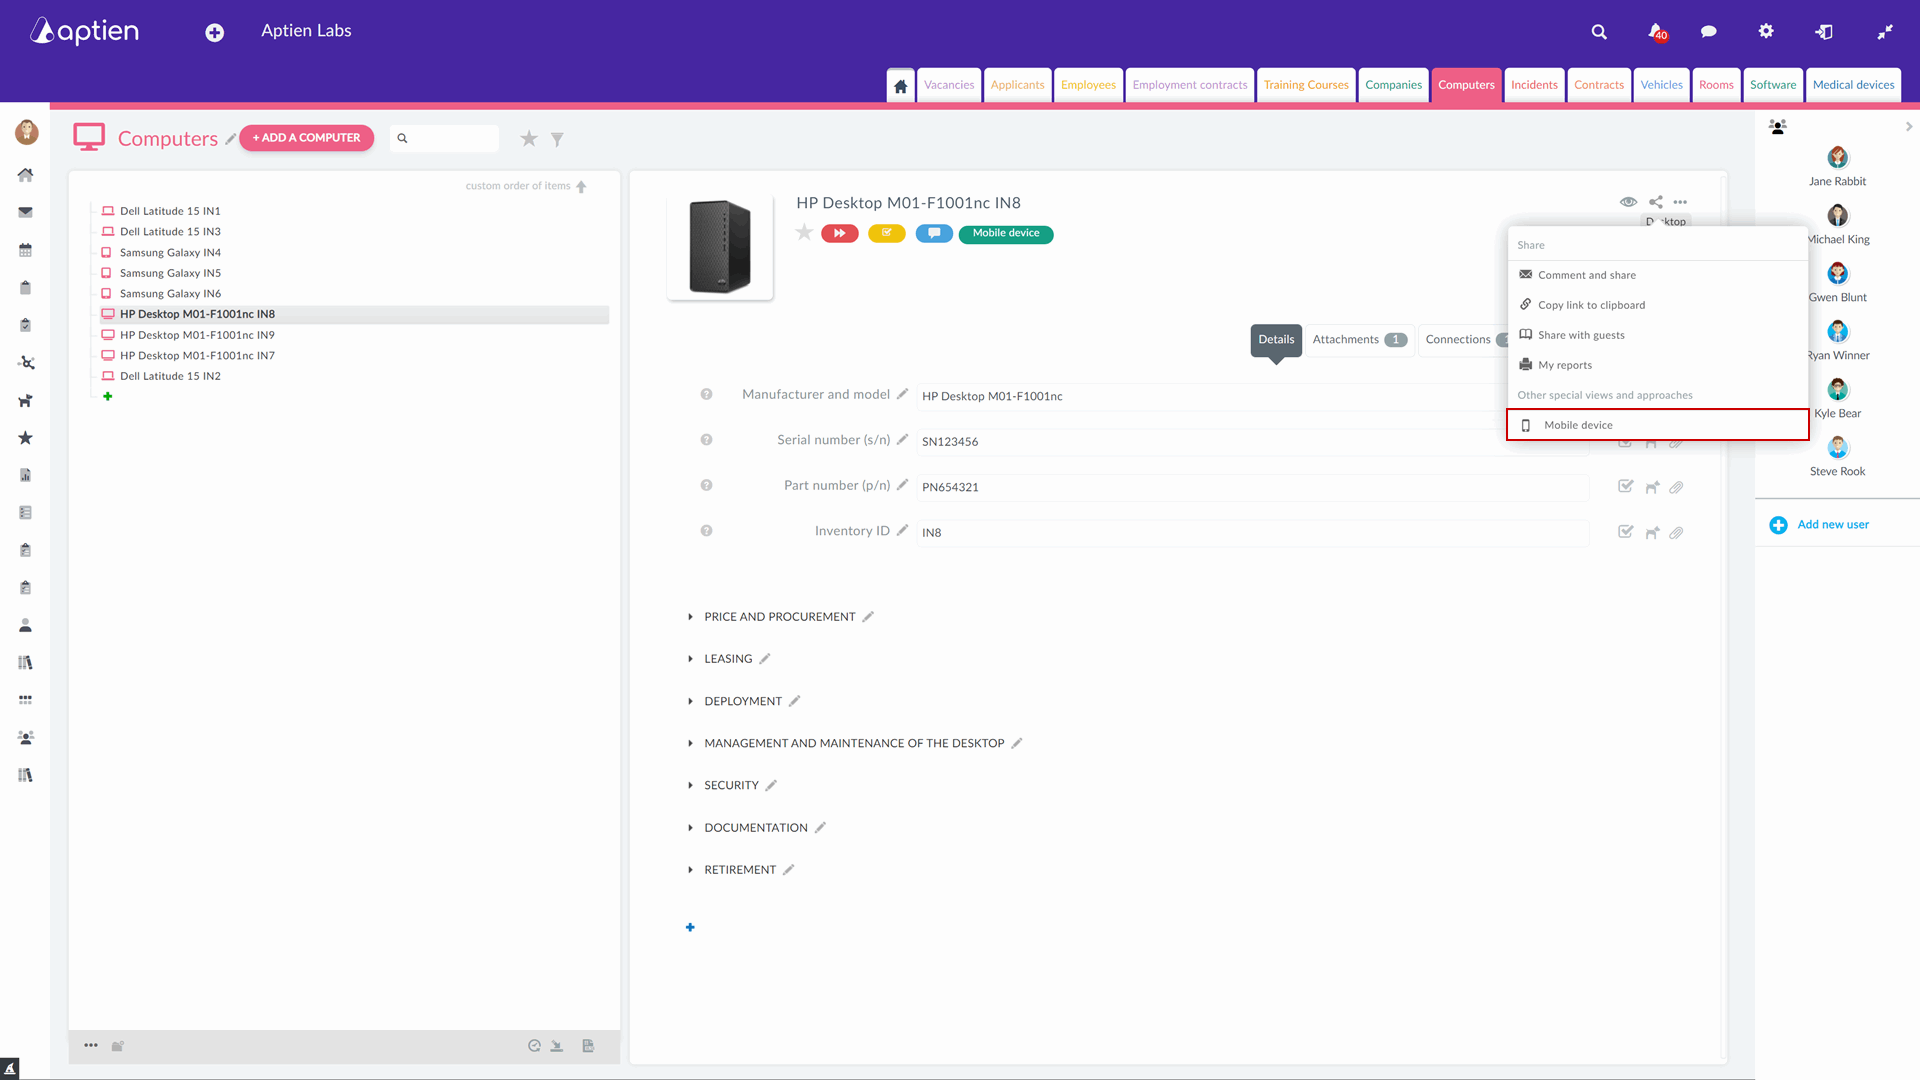
How to print a QR label
A QR label can only be printed for a view by a person who has been granted share permission for their role.
- Go to the organizer where you have the QR label (view) set up
- Open the entry for which you want to print the QR label
- Click the share icon in the top right corner
- Open the view
- Click on the "Print QR" button
- Click on the "Print ticket" button
- Select the format for printing
- Select the printer icon in the top right corner and follow the on-screen instructions